

The general description of the game and the game archive can be found on the «How to create strategy game — Visual Basic 6» and «General description of the game and the economy in the game» pages.
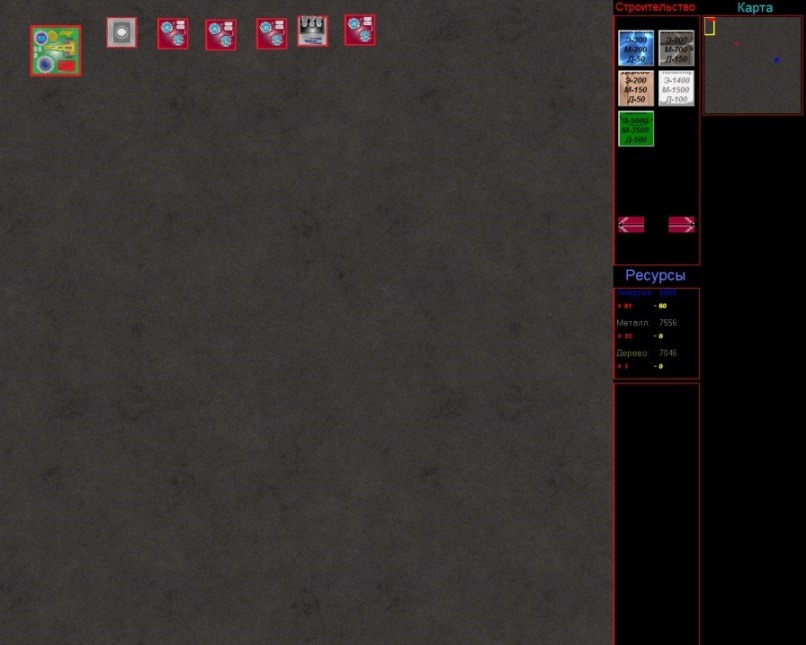
Now let’s take a look at how the simplest levels are generated in my game. In my case, the selected level texture is simply filled in across the game area.
It looks like this at first:
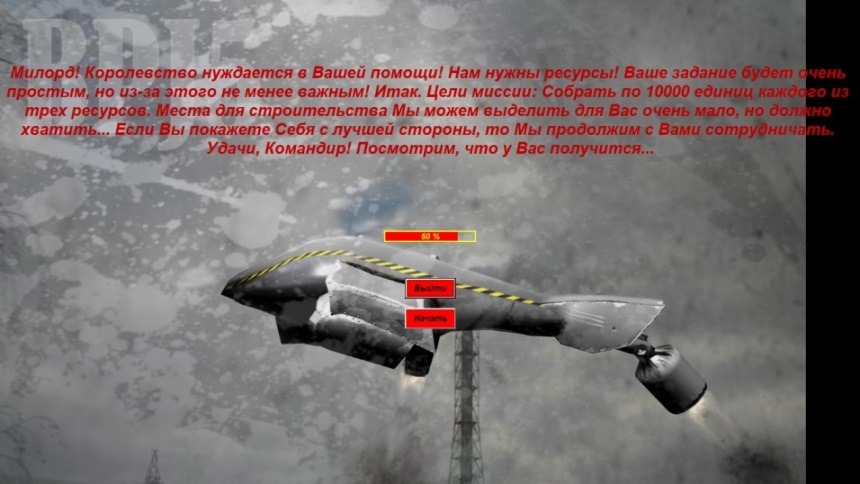
After clicking the «Load» button, the loading bar appears, which is the map generation and after it finishes, the «Start» button appears (I have displayed both buttons at once for convenience):
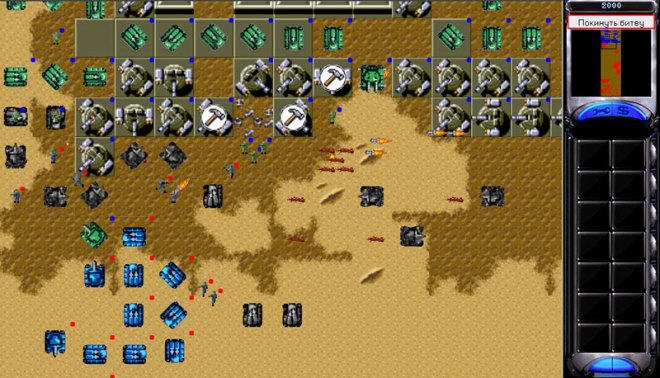
By clicking on the «Start» button, the game begins and screenshots of the game have already been shown.
We’ll discuss what happens next later, right now, I’ll explain what happens between clicking «Load» and «Start». First, I will display all the code of the form, and then briefly explain what’s working and how.
Option Explicit
Private Type progbar
Max As Integer
Value As Single
OdinShag As Single
End TypeDim Loading As progbar
Dim Tex As String
Dim NumSim As IntegerPrivate Sub Command1_Click()
Form1.Timer1.Enabled = True
Form1.Zaslonka.Visible = True
Tex = «»
Label1 = «»
TextTmr.Enabled = False
‘If Trim(Nick.Text) <> «» And Level = 1 Then plaYer = Trim(Nick.Text)
‘If Trim(Nick.Text) = «» Then plaYer = «Player1»
Form1.Show
Unload Form2
If connect = True Then Form1.picture1.Left = Form1.picture1.Left — Form1.Baza(601).Left: Form1.picture1.Top = Form1.picture1.Top — Form1.Baza(601).Top: PosOfMapX = Form1.Baza(601).Left — 170: PosOfMapY = Form1.Baza(601).Top — 150
End SubPrivate Sub Command2_Click()
ObBar.Visible = True
Label2.Visible = True
PrBar.Visible = True
LoadingTmr.Enabled = True
Timer2.Enabled = True
‘Label3.Visible = True
Command2.Visible = False
End SubPublic Sub Paint()
If Level = 1 Then
Loading.Value = 0
Loading.Max = 10
For RendX = 0 To Form1.picture1.Width Step 600
Loading.Value = Loading.Value + 1
Label2 = Loading.Value
For RendY = 0 To Form1.picture1.Height Step 600
Form1.picture1.PaintPicture Form1.Piclevel1.Picture, RendX, RendY
Next
Next
ElseIf Level = 2 Then
Loading.Value = 0
Loading.Max = 10
Form2.Command1.Visible = True
Form2.Command1.Top = Form2.Command1.Top + Form2.Command1.Height
For RendX = 0 To Form1.picture1.Width Step 600
Loading.Value = Loading.Value + 1
For RendY = 0 To Form1.picture1.Height Step 600
Form1.picture1.PaintPicture Form1.Piclevel2.Picture, RendX, RendY
Next
Next
End If
End SubPrivate Sub Command3_Click()
End
End SubPrivate Sub Form_Load()
Loading.Max = 1
Load Form1
TextTmr.Enabled = False
NumSim = 0
TimeLoading = 0
Label1 = «»
Tex = «»
Command1.Left = ScreenShir / 2 — Command1.Width / 2
Command1.Top = ScreenVys / 2 — Command1.Height / 2 + Command2.Height + 120
If Level = 1 Then Tex = «Милорд! Королевство нуждается в Вашей помощи! Нам нужны ресурсы! Ваше задание будет очень простым, но из-за этого не менее важным! Итак. Цели миссии: Собрать по 10000 единиц каждого из трех ресурсов. Места для строительства Мы можем выделить для Вас очень мало, но должно хватить… Если Вы покажете Себя с лучшей стороны, то Мы продолжим с Вами сотрудничать. Удачи, Командир! Посмотрим, что у Вас получится…»
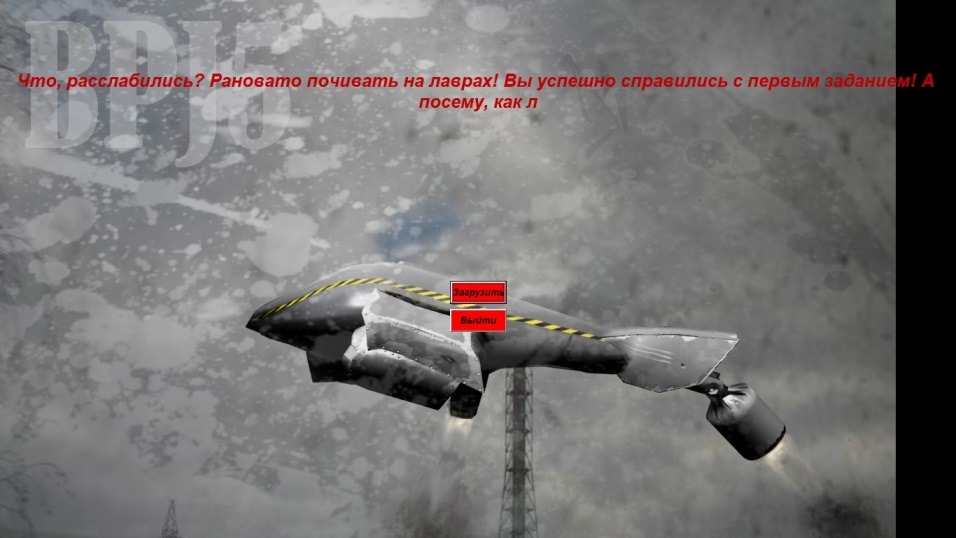
If Level = 2 Then Tex = «Что, расслабились? Рановато почивать на лаврах! Вы успешно справились с первым заданием! А посему, как лучшего Командующего Королевства, придется Вас сразу бросить в пекло Войны… Враг не дремлет и находится рядом с Королевством. Ваша база должна быть отстроена на границе. Задача же такова: Уничтожить подступающего к Королевству противника! Да так, чтобы он больше никогда не захотел делать попытку откусить лакомый кусочек от нашей Славной Державы! Покажите ему Кузькину мать!!!»
TextTmr.Enabled = True
Label1.Width = ScreenShir
Label1.Height = 400
Label1.Top = 100Command2.Left = ScreenShir / 2 — Command2.Width / 2
Command2.Top = Screen.Height / Screen.TwipsPerPixelX / 2 — Command2.Height / 2 + Command2.Height
Command3.Left = Command2.Left ‘ ScreenShir / 2 — Command2.Width / 2
Command3.Top = Screen.Height / Screen.TwipsPerPixelX — Command3.HeightNick.Left = ScreenShir / 2 — Nick.Width / 2
Nick.Top = Screen.Height / Screen.TwipsPerPixelX / 2 — Nick.Height / 2 + Nick.Height + 40
LblNick.Left = ScreenShir / 2 — LblNick.Width / 2
LblNick.Top = Screen.Height / Screen.TwipsPerPixelX / 2 — LblNick.Height / 2 + LblNick.Height + 10ObBar.Left = ScreenShir / 2 — ObBar.Width / 2
ObBar.Top = Screen.Height / Screen.TwipsPerPixelX / 2 — Command2.Height / 2
PrBar.Left = ObBar.Left
PrBar.Top = Screen.Height / Screen.TwipsPerPixelX / 2 — Command2.Height / 2
Label2.Left = ObBar.Left
Label2.Top = Screen.Height / Screen.TwipsPerPixelX / 2 — Command2.Height / 2
Label3.Left = ScreenShir / 2 — Label3.Width / 2
Label3.Top = Screen.Height / Screen.TwipsPerPixelX / 2 — Label3.Height / 2 + Command2.Height + Label3.Height
Loading.Value = 0
RendX = 0
RendY = 0Form1.picture1.Cls
‘Command2_Click
End SubPrivate Sub TextTmr_Timer()
NumSim = NumSim + 1
If NumSim <= Len(Tex) Then
Label1 = Left(Tex, NumSim)
If Left(Label1, 2) = «: » Or Left(Label1, 2) = «? » Or Left(Label1, 2) = «! » Or Left(Label1, 2) = «. » Then Sleep 500
If Left(Label1, 1) <> » » Then
PlaySound App.Path + «\klac.smus», 1, 1
‘PlaySound App.Path + «\clicking.smus», 1, 1
Else
‘PlaySound App.Path + «\probel.smus», 1, 1
End If
Else
TextTmr.Enabled = False
PlaySound App.Path + «\endwrite.smus», 1, 1
End If
End SubPrivate Sub Timer1_Timer()
Loading.OdinShag = ObBar.Width / Loading.Max
If Loading.Value <= Loading.Max Then PrBar.Width = Loading.OdinShag * Loading.Value
If Loading.Value >= Loading.Max Then
Label2.ForeColor = vbBlue
PrBar.BackColor = vbYellow
If Level = 1 Then
LblNick.Visible = True
Nick.Visible = True
End If
End If
End SubPrivate Sub LoadingTmr_Timer()
If plaYer = «» Then plaYer = «Player1″
If Procents <= 100 Then Label2 = Procents & » %» Else Loading.Value = Loading.Max: Label2 = «100 %»: PrBar.Width = Loading.OdinShag * Loading.Max
help = Loading.Max & «…..» & Loading.ValueIf Level = 1 Then
Loading.Max = Round(Form1.picture1.Width / Form1.Piclevel1.ScaleWidth) * Round(Form1.picture1.Height / Form1.Piclevel1.ScaleHeight)
Procents = Int(Loading.Value / Loading.Max * 100)
If RendX < Form1.picture1.Width And RendY < Form1.picture1.Height Then
Form1.picture1.PaintPicture Form1.Piclevel1.Picture, RendX, RendY
Loading.Value = Loading.Value + 1
End If
If RendX < Form1.picture1.Width Then RendX = RendX + Form1.Piclevel1.ScaleWidth Else: RendX = 0: RendY = RendY + Form1.Piclevel1.ScaleHeight
If RendY > Form1.picture1.Height Then
Timer2.Enabled = False
Form1.Image1.Picture = Form1.picture1.Image
LoadingTmr.Enabled = False
‘plaYer = Trim(InputBox(«Какой вы хотите иметь ник в игре?», «Ваш ник?», «Player1»))
Command1.Visible = True
If plaYer = «» Then plaYer = «Player1″
End If
End IfIf Level = 2 Or Level = 100 Then
Loading.Max = Round(Form1.picture1.Width / Form1.Piclevel2.ScaleWidth) * Round(Form1.picture1.Height / Form1.Piclevel2.ScaleHeight)Procents = Int(Loading.Value / Loading.Max * 100)
If RendX < Form1.picture1.Width And RendY < Form1.picture1.Height Then
Form1.picture1.PaintPicture Form1.Piclevel2.Picture, RendX, RendY
Loading.Value = Loading.Value + 1
End If
If RendX < Form1.picture1.Width Then RendX = RendX + Form1.Piclevel2.ScaleWidth Else: RendX = 0: RendY = RendY + Form1.Piclevel2.ScaleHeight
If RendY > Form1.picture1.Height Then
Form1.Image1.Picture = Form1.picture1.Image
LoadingTmr.Enabled = False
Command1.Top = Screen.Height / Screen.TwipsPerPixelX / 2 — Command1.Height / 2 + Command1.HeightCommand1.Visible = True
End If
End IfIf Level = 3 Then
Loading.Max = Round(Form1.picture1.Width / Form1.Piclevel3.ScaleWidth) * Round(Form1.picture1.Height / Form1.Piclevel3.ScaleHeight)Procents = Int(Loading.Value / Loading.Max * 100)
If RendX < Form1.picture1.Width And RendY < Form1.picture1.Height Then
Form1.picture1.PaintPicture Form1.Piclevel3.Picture, RendX, RendY
Loading.Value = Loading.Value + 1
End If
If RendX < Form1.picture1.Width Then RendX = RendX + Form1.Piclevel3.ScaleWidth Else: RendX = 0: RendY = RendY + Form1.Piclevel3.ScaleHeight
If RendY > Form1.picture1.Width Then
Form1.Image1.Picture = Form1.picture1.Image
LoadingTmr.Enabled = False
Command1.Top = Screen.Height / Screen.TwipsPerPixelX / 2 — Command1.Height / 2 + Command1.HeightCommand1.Visible = True
End If
End If
End SubPrivate Sub Timer2_Timer()
TimeLoading = TimeLoading + 1
Label3 = TimeLoading & » мс»
End Sub
Initially, Timer1 is turned on, which starts writing the briefing text depending on the current level. At the first level, it is: «My lord! The kingdom needs your help!…» It is printed letter by letter to the sound of a typewriter. Then, when the «Load» button is pressed, the map generation starts and a progress bar, Zaslonka, is displayed. Before the first level, the player is also asked for a nickname after the progress bar is filled. This is used to address the player by name, as well as in online play (although the developer decided to use a simple in-game chat instead of a full online mode).
Moving on to the actual map generation in the Public Sub Paint() function. It is quite simple: a seamless texture is duplicated many times using a loop over the entire game area, first moving to the end on the right side with a width step of the texture (600 pixels), then moving down by the height of the texture (also 600 pixels), and so on until the end of the game field.
For RendX = 0 To Form1.picture1.Width Step 600
For RendY = 0 To Form1.picture1.Height Step 600
Drawing is done through Form1.picture1.PaintPicture Form1.Piclevel1.Picture, RendX, RendY.
There’s nothing complicated in this simple implementation. After this, other textures can be drawn on top of the main one (for example, mountains, lakes, etc.), which the developer wanted to do but didn’t have time for. The developer also wanted to have metal and wood resources in specific places on the map, as was done in Annihilation, but didn’t implement it.
The code also displays how long it takes to generate the map (in milliseconds). As the progress bar fills up, it changes color, and loading is shown as a percentage. There are also other aesthetic details. Note that each of these details took some time to implement, as the internet was not readily available and the MSDN code library was not working at the time.
Later on, while in the military, the developer came up with other ideas, but cannot remember them well enough. Most likely, some code was written on paper, but was not tested.
Finally, the developer wants to write about how the viewing area (working area) can be moved across the larger map while displaying a small copy of it on the top right (radar). This was also an interesting feature and may be useful to someone.
A series of articles on the creation of games in the strategy genre — Strategy:
- How to create your game strategy.
- General description of the game and the economy in the game .
- Drawing the level and loading screen in our strategy game (this article).
Links to Download the game «Strategy»:
Strategy (Full Version) ( Downloaded: 45940 times )
Strategy (Light Version) ( Downloaded: 48014 times )
Can I just say what a relief to uncover somebody who truly understands what theyre talking about over the internet. You definitely understand how to bring an issue to light and make it important. More and more people have to read this and understand this side of the story. I was surprised that you arent more popular given that you certainly have the gift.